This is the first in my series of Christmas Cookies. I will cover basic cookie making procedures here. I will not bore you with repeating all the basic stuff for every cookie. So, check here for methodology.
1 cup butter, room temperature
2/3 cup sugar
1/3 brown sugar
1 egg yolk
2 cups flour
1 1/2 teaspoon cinnamon
1/4 teaspoon salt
cinnamon red hots candies
Makes 4 dozen cookies
Directions:
Cream butter and sugars.
Add egg yolk and blend well.
Add salt and cinnamon.
Add flour.
Place completed dough into the fridge until well chilled and firm. I regularly make my dough one day and bake the next.
Heat oven to 300*F.
Drop chilled dough by rounded teaspoon onto parchment lined cookie trays.
I use my trusty small scoop.

Very reliably even sized cookies. Sorry, it's a compulsion. LOL!

Decorate each cookie with a cinnamon candy, if you'd like. It's simple, but festive. Plus, if you are making many different cookies you'll need to decorate them in a recognizable way so that you can easily tell all your drop cookies apart.

Bake for 20-25 minutes. In my oven, I bake for 22 minutes. Every oven is different, so adjust accordingly.

After removing from the oven, I allow the cookies to cook on the rack for a few minutes.

Then pull the parchment paper off onto the counter to continue cooling. Then you can reuse the tray quicker.

For storage, I use a plastic wrap lined foil tray, with a lid. I can see the plastic wrap to keep them fresh and the lid allows me to stack a few boxes. I keep the boxes in the garage as it is much cooler there and it saves room in the fridge.

Don't box up the cookies until they are completely cooled.

*****************************
Basic Baking Procedures and pictures
 We start with room temperature butter. Whip it up well. Light and fluffy is the name of the game. It isn't written into the recipe, but air is a big part in any baking good recipe. You want airy and light baked goods. Whipping air in is important.
 Adding sugars. Whip... This is after sugars have both been added and whipped up. See how the mixer has pushed some up the sides? Stop the mixer and scrape down the sides and whip a bit more. Get everything incorporated well. Also, do not try to push the stuff down the sides with the mixer running. You could ruin your mixer, your spoon and your face if it through the spoon up into your eyes. It's not worth it. Just turn it off.
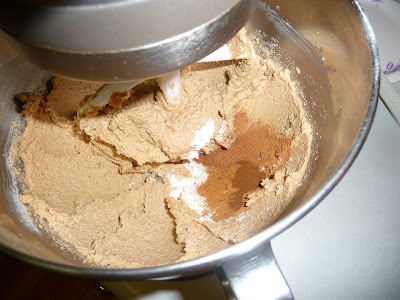
All whipped and beautiful! Now add dry ingredients (except flour), mix well. I like to mix dry and wet separately so that everything is well incorporated. No one wants a clump of salt or spice in their dough.

We often need egg yolks. There are fancy gadgets out there to separate egg whites from yolks, but honestly, the egg shell is the best tool. Back and forth between the shell halves and the white falls into a bowl. Yes, I save the whites. I have other recipes that call for whites. Royal Icing also is made from whites. Egg white can even be frozen for use later. Add the yolk to the mixer and blend well.
After the wet ingredients, all that's left is the flour. Add flour slowly so it doesn't fling out of the mixer. Here's the finished dough.
 After it's done, I put it into a bowl, cover with plastic wrap and into the fridge to chill. :) The chilling is a necessary step. If you dipped out spoonfuls now, the cookies would spread farther and maybe burn, but surely have less loft and would not hold their shape. There are only a few cookies that need to be used with room temperature dough. They are clearly stated as such. Basic chocolate chip cookies can be done immediately. I'll show the difference in my white chocolate chip cookies in a later installment.

No comments:
Post a Comment